Today I received my Silicone Plastique which was amazing in itself as I only ordered it yesterday!! Very very impressed with The Cake Decorating Company!! Speedy stuff!! Anyhoo I read about the moulding putty online a couple of weeks ago and have been umming and aahing and finally decided to go for it and it's SO EXCITING!!
I wanted to make a mould of my logo for Twindividual as I thought it would be a nice idea when it comes to Craft Fair season to give out choccies to customers, however when I love to put my mark on things (quite literally in this sense) but love anything with a logo on (I'm a bit weird)! So anyway I then set about making my logo out of clay! The first attempt was a disaster so decided it would probably work better to cut out a square and then lay the logo bit over the top and this is what I managed:
I was really really pleased with the finished results and added a little Thank You in the bottom as these will hopefully be for people who have bought from us! Fingers crossed!
So here is the Silicone Plastique all wrapped up and just out of the pot! It comes with the two parts the Blue and White which create a chemical reaction when mixed together! All clever scientific stuff!
So you need to get equal amounts of each part and the smoosh and mix them all together
Here it is mid mix, you need to mix it until it is a uniform colour with no streaks of either white or the darker blue
Like this taa daa! So then you roll it into a ball to get rid of the creases created from mixing! Or you can put it between plastic and roll it out to a nice thickness
Then I pushed my design into the putty and waited!! On this first one I had used greaseproof paper as my base! THIS WAS A BAD IDEA as when I pushed the clay into the putty the bottom got all stuck to the greaseproof paper and wouldn't move it came off alright when it had dried but it didn't help much when trying to get a good shaped mold. So I used a cling film base for my second one and that worked much better!
Here are the two together still drying, here they had dried enough that i could move the first one (left) onto the cling film too bur you can see how much thinner around the edges that one is where I couldn't move it cause it had got stuck to the greaseproof compared to the one on the right.
And here they are Mold made!! SO COOL!! I am so excited to try these out! Need to go and get some chocolate first though!
I shall post again when some chocolate versions have been made so you can see how they turn out!! Woo hoo, it's just such a satisfying experience when it all turns to rubber and the impression is exposed!!
Speak Soon
Nat -x-
Friday, 3 February 2012
Wednesday, 1 February 2012
Love My Twin
So here's another Mini Album I made, this one is Twin Themed ... as I'm a Twin obviously!
I'm a huge fan of Distress Inks so this Albums has been Distressed to within an Inch of it's life lol!
I had just some bits of cardboard lying around, you know the type that just comes as part of the packaging of other stuff, so decided to cut them up to make the pages of my Mini Album as well as the coordinating box for it to go it! A nice bit of cardboard recycling!
So this is the front that says 'Love My Twin' I've used Distress Inks: Dusty Concord, Broken China and Faded Jeans, the Love and Script stamp are Tim Holtz too (I think it might be called Urban Grunge but I'm not too sure on that one! Hand made paper flower (I do like making flowes) and a Cricut Cut Swirl which has been Inked and then stamped with the script stamp!
The Ribbon holding this together was actually on one of my Christmas Presents but rather than throw it away I put it to use as a closure to keep the whole thing together.
This is a spiral photo mat with a nice little Twin quote which I thought was lovely! I've added some ribbon and paper flowers to accent! The background was done by scrunching up a piece of paper and inking over the top straight away with the ink pad then I spritzed it with some Cosmic Shimmer which had been mixed with water to give it a nice sheen!
The next page just has a piece of ribbon across it which I sewed some beads on to make it look prettier and then tucked a photo mat in which has the image of a fairy in the corner
This is just a frame which has acetate over the aperture, and is open at the side so that a photo can be slipped in
Another frame of sorts. I cut this image out of acetate using the cricut and then inked it with Walnut Stain Distress and attached it to the page with brads in the four corners which allows this tag to slide in and out. The tag has the image of a bird which has been embossed with clear glitter embossing powder
This is a little pouch which lifts up to reveal a pocket with a little photo mat in it, as well as a little tag which tucks into a little flourish tab!
These photo mats all slide into one another! The two that come out are double side! The first one reads: "It's double the giggles and double the grins and double the trouble when you're blessed to be a twin" They are all decorated with handmade paper flowers and gems
Another tag which is tucked into a pretty flourish pocket! Love this stamp on the background as well, its actually from a Papermania Cake stamp which I just repeated
This is a little 'My Twin' book which slides out from the ribbon and has room for Photos and some Journalling
This is a gatefold opening which has a thread fastening around some brad closures. I added some beads to the end of the thread! It then opens up to reveal photo and journalling space
This is an envelope which I inked up to coordinated and then cut out the letters spelling out LOVE and attached them to some ribbon which then pull out of the envelope.
Each letter of love is decorated with the separate letters that also spell out TWIN!
This is the back of the album with the velcro closure
And in its box!
I loved making this album and making all the different pockets and booklets and various little areas to put photos and journalling!
Speak Soon
Nat -x-
I shall be entering this into Cupcake Craft Challenge 177 - Recycle
and Make It Monday 74
I'm a huge fan of Distress Inks so this Albums has been Distressed to within an Inch of it's life lol!
I had just some bits of cardboard lying around, you know the type that just comes as part of the packaging of other stuff, so decided to cut them up to make the pages of my Mini Album as well as the coordinating box for it to go it! A nice bit of cardboard recycling!
So this is the front that says 'Love My Twin' I've used Distress Inks: Dusty Concord, Broken China and Faded Jeans, the Love and Script stamp are Tim Holtz too (I think it might be called Urban Grunge but I'm not too sure on that one! Hand made paper flower (I do like making flowes) and a Cricut Cut Swirl which has been Inked and then stamped with the script stamp!
The Ribbon holding this together was actually on one of my Christmas Presents but rather than throw it away I put it to use as a closure to keep the whole thing together.
This is a spiral photo mat with a nice little Twin quote which I thought was lovely! I've added some ribbon and paper flowers to accent! The background was done by scrunching up a piece of paper and inking over the top straight away with the ink pad then I spritzed it with some Cosmic Shimmer which had been mixed with water to give it a nice sheen!
The next page just has a piece of ribbon across it which I sewed some beads on to make it look prettier and then tucked a photo mat in which has the image of a fairy in the corner
This is just a frame which has acetate over the aperture, and is open at the side so that a photo can be slipped in
Another frame of sorts. I cut this image out of acetate using the cricut and then inked it with Walnut Stain Distress and attached it to the page with brads in the four corners which allows this tag to slide in and out. The tag has the image of a bird which has been embossed with clear glitter embossing powder
This is a little pouch which lifts up to reveal a pocket with a little photo mat in it, as well as a little tag which tucks into a little flourish tab!
These photo mats all slide into one another! The two that come out are double side! The first one reads: "It's double the giggles and double the grins and double the trouble when you're blessed to be a twin" They are all decorated with handmade paper flowers and gems
Another tag which is tucked into a pretty flourish pocket! Love this stamp on the background as well, its actually from a Papermania Cake stamp which I just repeated
This is a little 'My Twin' book which slides out from the ribbon and has room for Photos and some Journalling
This is a gatefold opening which has a thread fastening around some brad closures. I added some beads to the end of the thread! It then opens up to reveal photo and journalling space
This is an envelope which I inked up to coordinated and then cut out the letters spelling out LOVE and attached them to some ribbon which then pull out of the envelope.
Each letter of love is decorated with the separate letters that also spell out TWIN!
This is the back of the album with the velcro closure
And in its box!
I loved making this album and making all the different pockets and booklets and various little areas to put photos and journalling!
Speak Soon
Nat -x-
I shall be entering this into Cupcake Craft Challenge 177 - Recycle
and Make It Monday 74
My Shamballa Attempt
I've recently been getting into making beads out of Polymer Clay, all very new and exciting and definitely a work in progress it has to be said!
Then the other day I found a tutorial on Shamballa knotting and thought why not I'll give it a go! I had some lovely thread lying around doing nothing so I combined the two!
This was my first attempt. I used white Polymer Clay to make the beads and coloured them using Cosmic Shimmer Mica Powders and working it into the clay before it was baked! These beads were pretty big though so I tried to make some that were a bit smaller:
These were done in the same way but coloured with Purple Mica Powders instead of Green! I LOVE the colour of this thread!
These beads were made using Black Polymer Clay and rolling it in Red Mica Powders which gave a slightly subtler sheen then those kneaded into the white clay!
These bronzey beads were made by kneading a bronzey mica powder in, I'm not sure how I feel about this colour though and I also added some black beads just for a bit of contrast!
Not a bad beginning I hope!
Speak Soon
Nat -x-
Then the other day I found a tutorial on Shamballa knotting and thought why not I'll give it a go! I had some lovely thread lying around doing nothing so I combined the two!
This was my first attempt. I used white Polymer Clay to make the beads and coloured them using Cosmic Shimmer Mica Powders and working it into the clay before it was baked! These beads were pretty big though so I tried to make some that were a bit smaller:
These were done in the same way but coloured with Purple Mica Powders instead of Green! I LOVE the colour of this thread!
These beads were made using Black Polymer Clay and rolling it in Red Mica Powders which gave a slightly subtler sheen then those kneaded into the white clay!
These bronzey beads were made by kneading a bronzey mica powder in, I'm not sure how I feel about this colour though and I also added some black beads just for a bit of contrast!
Not a bad beginning I hope!
Speak Soon
Nat -x-
Sunday, 29 January 2012
Polymer Clay Magnets
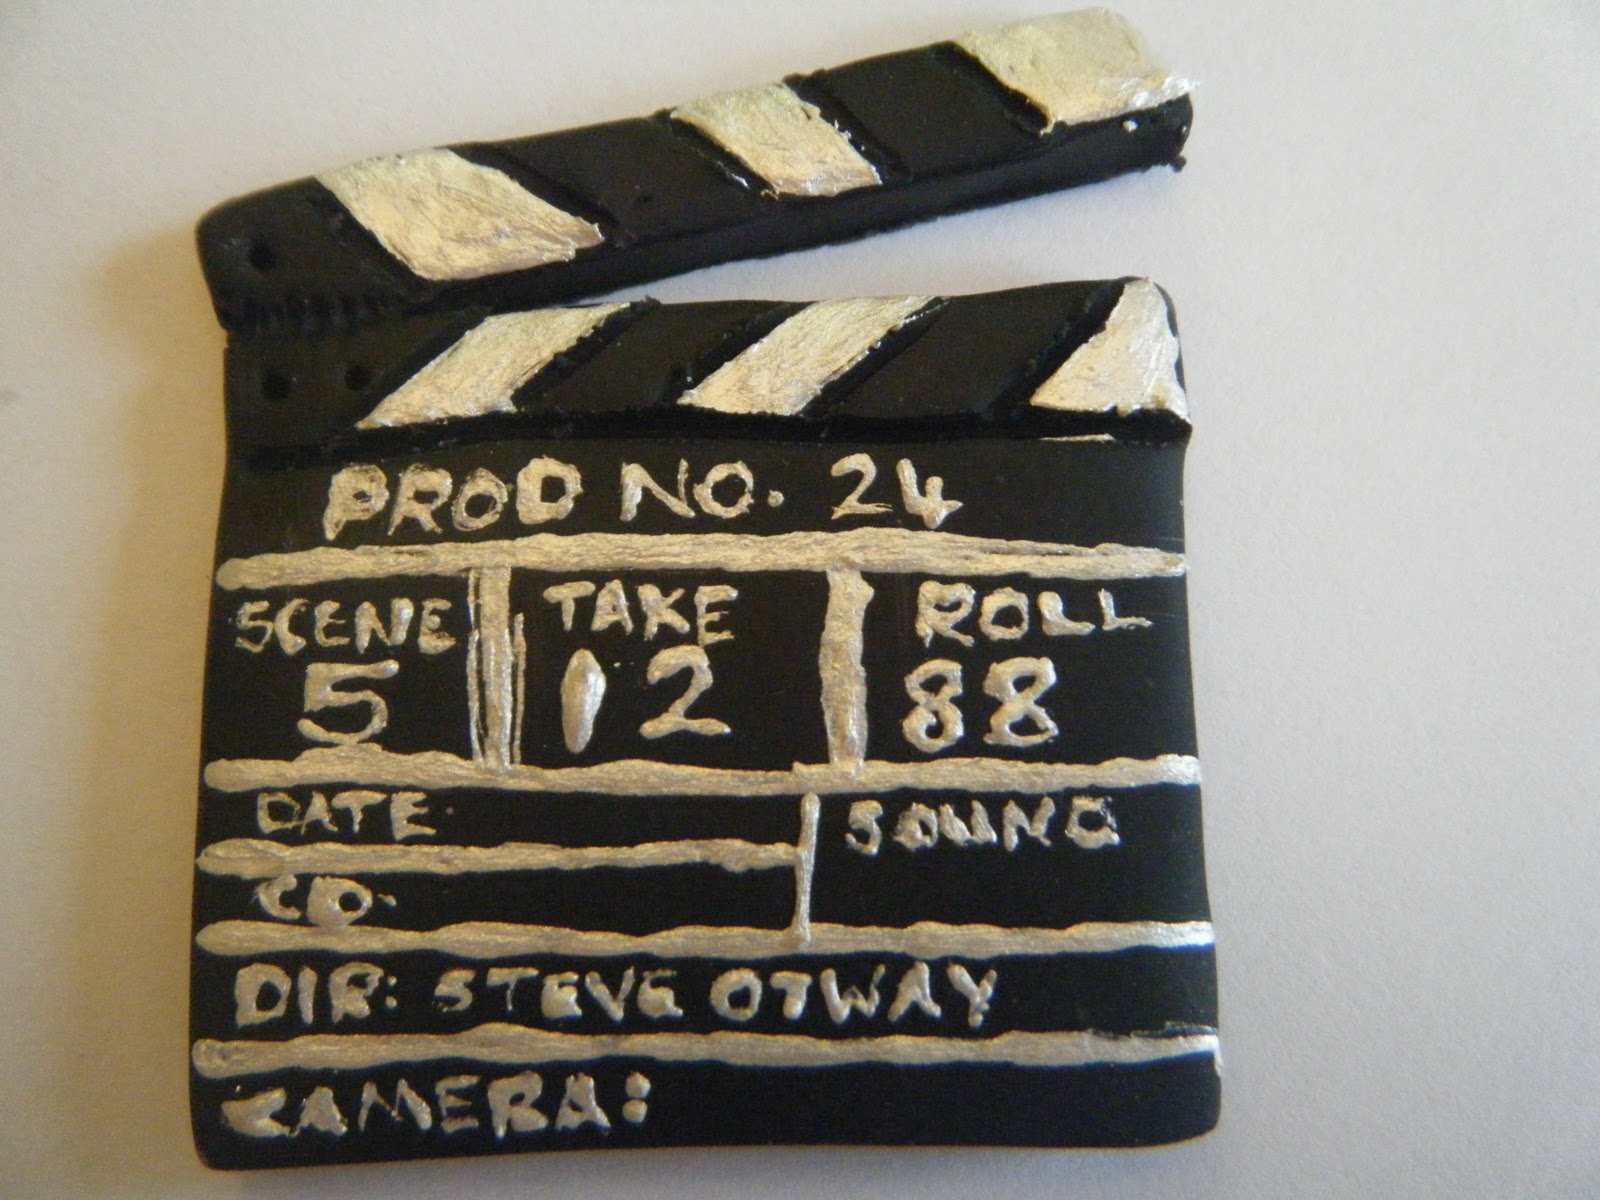
These were my first attempts into the world of Poylmer Clay! I made some magnets for my friend for his birthday and as he is a fellow movie lover like me there was only one thing for it! I also personalised them for him so they were just his! And I was particularly pleased with the clapper board!
The clapperboard before it had been personalised! Very hard writing with a cocktail stick but just about legible!
Painted the base with Acrylic paint!
Personalised to make it one of a kind!
And a bit of gold paint to finish it off!! In hindsight I probably should have just written straight onto the star rather than trying to etch it in the clay! Live and learn!
Speak soon
Nat -x-
The clapperboard before it had been personalised! Very hard writing with a cocktail stick but just about legible!
Painted the base with Acrylic paint!
Personalised to make it one of a kind!
And a bit of gold paint to finish it off!! In hindsight I probably should have just written straight onto the star rather than trying to etch it in the clay! Live and learn!
Speak soon
Nat -x-
Subscribe to:
Posts (Atom)