Here is a card I recently made for my best friend as she was going for a job interview (she got the job incidentally - so proud :-D) but just wanted to share it as I was really happy with it, and so was she which is what matters most!!
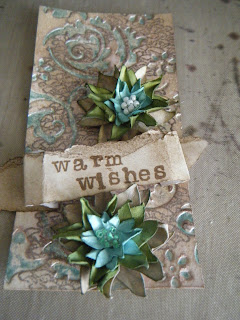
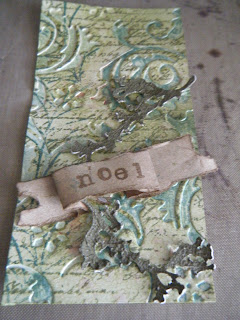
Really really enjoying doing this technique with the tags and debossing the image with a separate colour! Here I used the Cuttlebug All-in-One folder with the 'Thank You' plate I think it was (it might have been 'Beautiful') using Spiced Marmalade Distress Ink!
Also very proud of these flowers, here I used a combination of Frayed Burlap, Vintage Photo and Walnut Stain distress inks to colour the flowers!
Hope you enjoy. Speak soon
Nat -x-
http://ppp-makeitmonday.blogspot.com/2011/11/make-it-monday-65-blogger-trouble.html
Monday, 28 November 2011
Saturday, 26 November 2011
Ideas!
Here are some sample invitations. Obviously they are just ideas and can be done in any combination or mixed and matched together! Let me know what you think xx
Tuesday, 15 November 2011
Thinking Pink
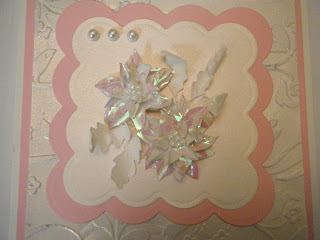
I've just made this card for the 'My Time to Craft" challenge: http://mytimetocraftchallenge.blogspot.com/2011/11/challenge-166-take-two.html and for some reason it feels very different to anything else I've done for a while, I think it might be cause it's pink and I've actually managed to make something without actually using any distress inks for the first time in a very long time!! (There is a bit of distress crackle paint on the leaves though)! I'm really loving the look of this new style of flower and so have made them out of some very shiny paper and really like the effect instead of using inks to colour just white cardstock!!
Really liking this technique of just rubbing glitter along a strip of double sided tape!! Genius idea, I think I saw someone do it on Create and Craft!
Anyway very happy with the end result and quite excited to have finally made a card for a specific challenge!! Yay!!
Nat -x-
I'll also be adding this to make it monday challenge 63
Monday, 14 November 2011
Wish Upon a Star
My sister has just finished inking some of her images so I have put them to good use and made a card! As soon as I soon this image I knew I wanted to make it into a shaker card so that is exactly what I have done with some gold glittery stars!
I also embossed the stars with some more stars (however they were part of a cupcake embossing folder so there was a little more decoration added to the stars. I also like the idea of the 'wish' tag attached to the star because of 'wishing on a star'!
Very pleased with my finished result, and hope the monochrome background with just the golds and yellows works well!
Nat -x-
http://ppp-makeitmonday.blogspot.com/2011/11/make-it-monday-63.html
http://heartsonginspirations.blogspot.com/2011/11/challenge-25-gold-or-glitter.html
http://mytimetocraftchallenge.blogspot.com/2011/11/challenge-165-sun-moon-and-stars.html
Sunday, 13 November 2011
Tag! You're It!
I was browsing around on Tim Holtz's blog the other day, as you do, cause I absolutely love everything he does! And he shared a link to a friend of his blog with a rock candy crackle technique which I thought was absolutely stunning! This is the link if anyone else is interested and as I've pretty much copied her tag so credit where credit is due: http://tammytutterow.typepad.com/tammy_tutterow/2011/11/tuesday-tutorial-frosty-deboss.html
I had to slightly change mine though as I don't have any rock candy crackle paint (although I am now waiting for some to arrive) so instead I debossed with clear embossing powder on the embossing folder and then embossed with clear embossing glitter and I think it produced a very similar effect! I then made my own flowers and I LOVE how they turned out and cut a little branch thing and used some walnut stain crackle paint on that to get a nice branchy look! Anyway here is my finished take on Tammys technique:
Below is a close up of the debossed image hopefully you can see the sparkliness in the recessed parts!
I then started playing around with different colours and just debossed using the pine needles distress ink and left it as I thought it looked striking enough and used a mixture of peeled paint, vintage photo and frayed burlap to create these other looks:
I'm not entirely sure what to do with them now! Whether to put them on cards, or keep them as tags and put them on boxes? If anyone has any bright ideas or suggestions I would greatly appreciate them!!
Nat -x-
Thursday, 10 November 2011
Christmas
I have finally made a start on Christmas cards! Hooray!
I went for the classic red look, attempted to make some Poinsettias with my Art Nouveau Cricut cartridge and was quite pleased with the result! Also got very excited when my new foil colours arrived and I was able to foil the sentiment in red which I thought finished it off very nicely! But Christmas has finally started and yes I'm a bit late but you know "Better Late Than Never"!
http://ppp-makeitmonday.blogspot.com/2011/11/make-it-monday-62.html
http://mimchallegeblog.blogspot.com/2011/11/mmm-week-23-christmas.html
Wednesday, 9 November 2011
Feeling Blue
I got the new Cricut cartridge Art Nouveau the other day and yesterday made a Butterfly using all blue tones. I then set about making a card to put it on, however the first one I made turned out to be a bit too small and looked a bit too cluttered with the Butterfly on so instead I decided to use one of the line drawings my sister had done and had not yet got around to inking and colour it in myself, its true my colouring leaves quite a lot to be desired but this is the final result of that card:
Then I decided to try again for a base for my butterfly, but again it didn't quite work so I used the same image, resized it and this time decided to give colouring in with my distress inks and water brushes a go and was very pleased with the effect:
And then third time lucky I finally managed to get a base that I was happy to put my butterfly on. And in the process ended up with quite a few blue cards! But Im very happy with them all!
http://ppp-makeitmonday.blogspot.com/2011/11/make-it-monday-62.html
Friday, 4 November 2011
Foil It!!
I'm so excited I have just invested in a Foil It machine and can't believe how beautiful the results are with it! I've just been having a play really and mixing up the foils that came with the machine!
I've been trying to think of simple ideas for a friends wedding invitations and came up with this (so far):
She wanted a rose and a butterfly and I really liked these images so went with it! Although the actual invites (if they are like this) will be with a red rose and green leaves but I haven't got the right foils yet so had to work with what I had! The foiling hasn't come out brilliantly in the pics but it's stunning in real life!
Anyway very pleased with the results and just wanted to share them!
Speak soon
Nat -x-http://ppp-makeitmonday.blogspot.com/2011/10/make-it-monday-61.html
Subscribe to:
Comments (Atom)


